WorkBuddy - AI Agent Office Workspace
Connect WorkBuddy to the OpenAI-compatible 魔方AI endpoint through the custom model interface or models.json configuration file.
WorkBuddy is an AI Agent office tool from Tencent Cloud Code Assistant with support for custom models. Follow this guide to connect WorkBuddy to the OpenAI-compatible 魔方AI endpoint and use the models allowed by your API key.
1. Download and install WorkBuddy
Visit the WorkBuddy website and install the version for your system. Downloads are available for Windows x64, macOS on Apple silicon, and macOS on Intel.
2. Prepare your 魔方AI configuration
Have these values ready before you begin:
| Field | Value |
|---|---|
| Base URL | https://www.mofangai001.cn/v1 |
| API Key | A key created in the 魔方AI console, such as sk-your-api-key |
| Model ID | The exact upstream model ID allowed by the current key |
If you do not have an API key yet, follow the Quick Start. Enter the Base URL only through /v1; do not append /chat/completions.
3. Add a custom model in the interface
3.1 Open model settings
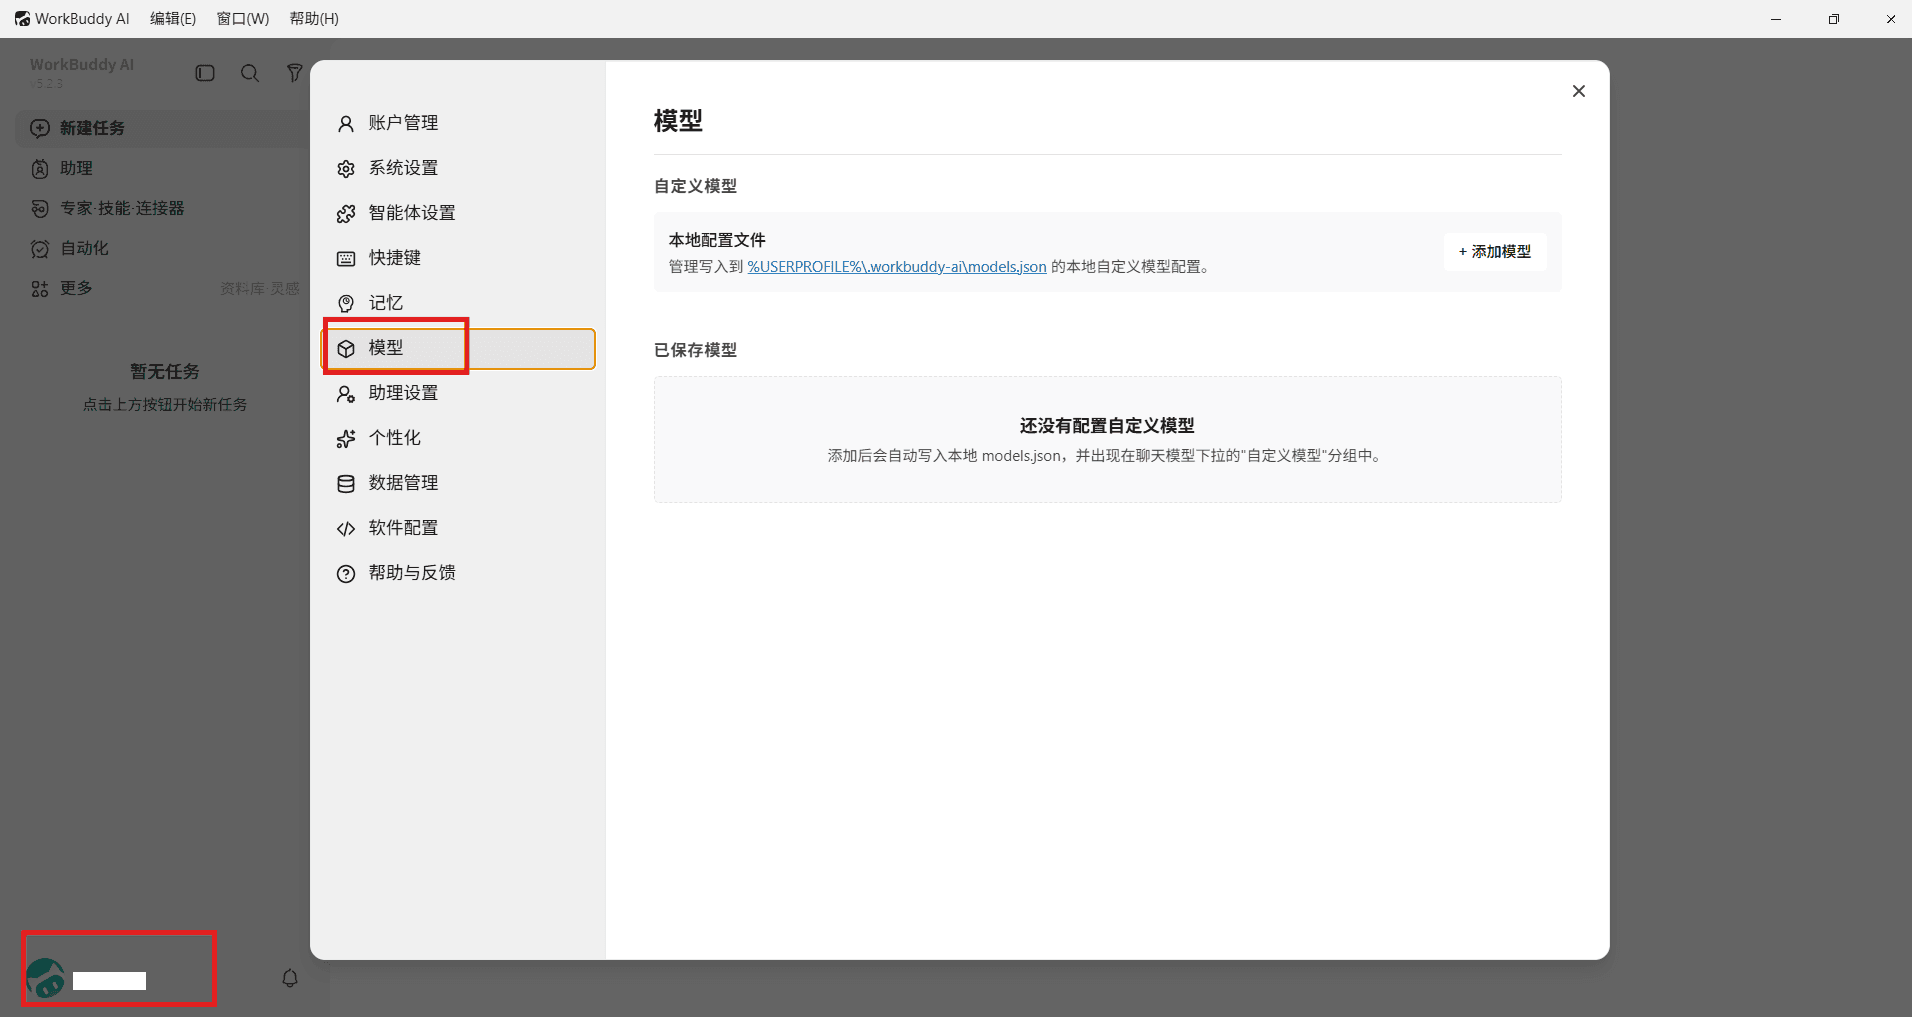
Open WorkBuddy, select the account menu in the lower-left corner, go to Settings, and choose Model.
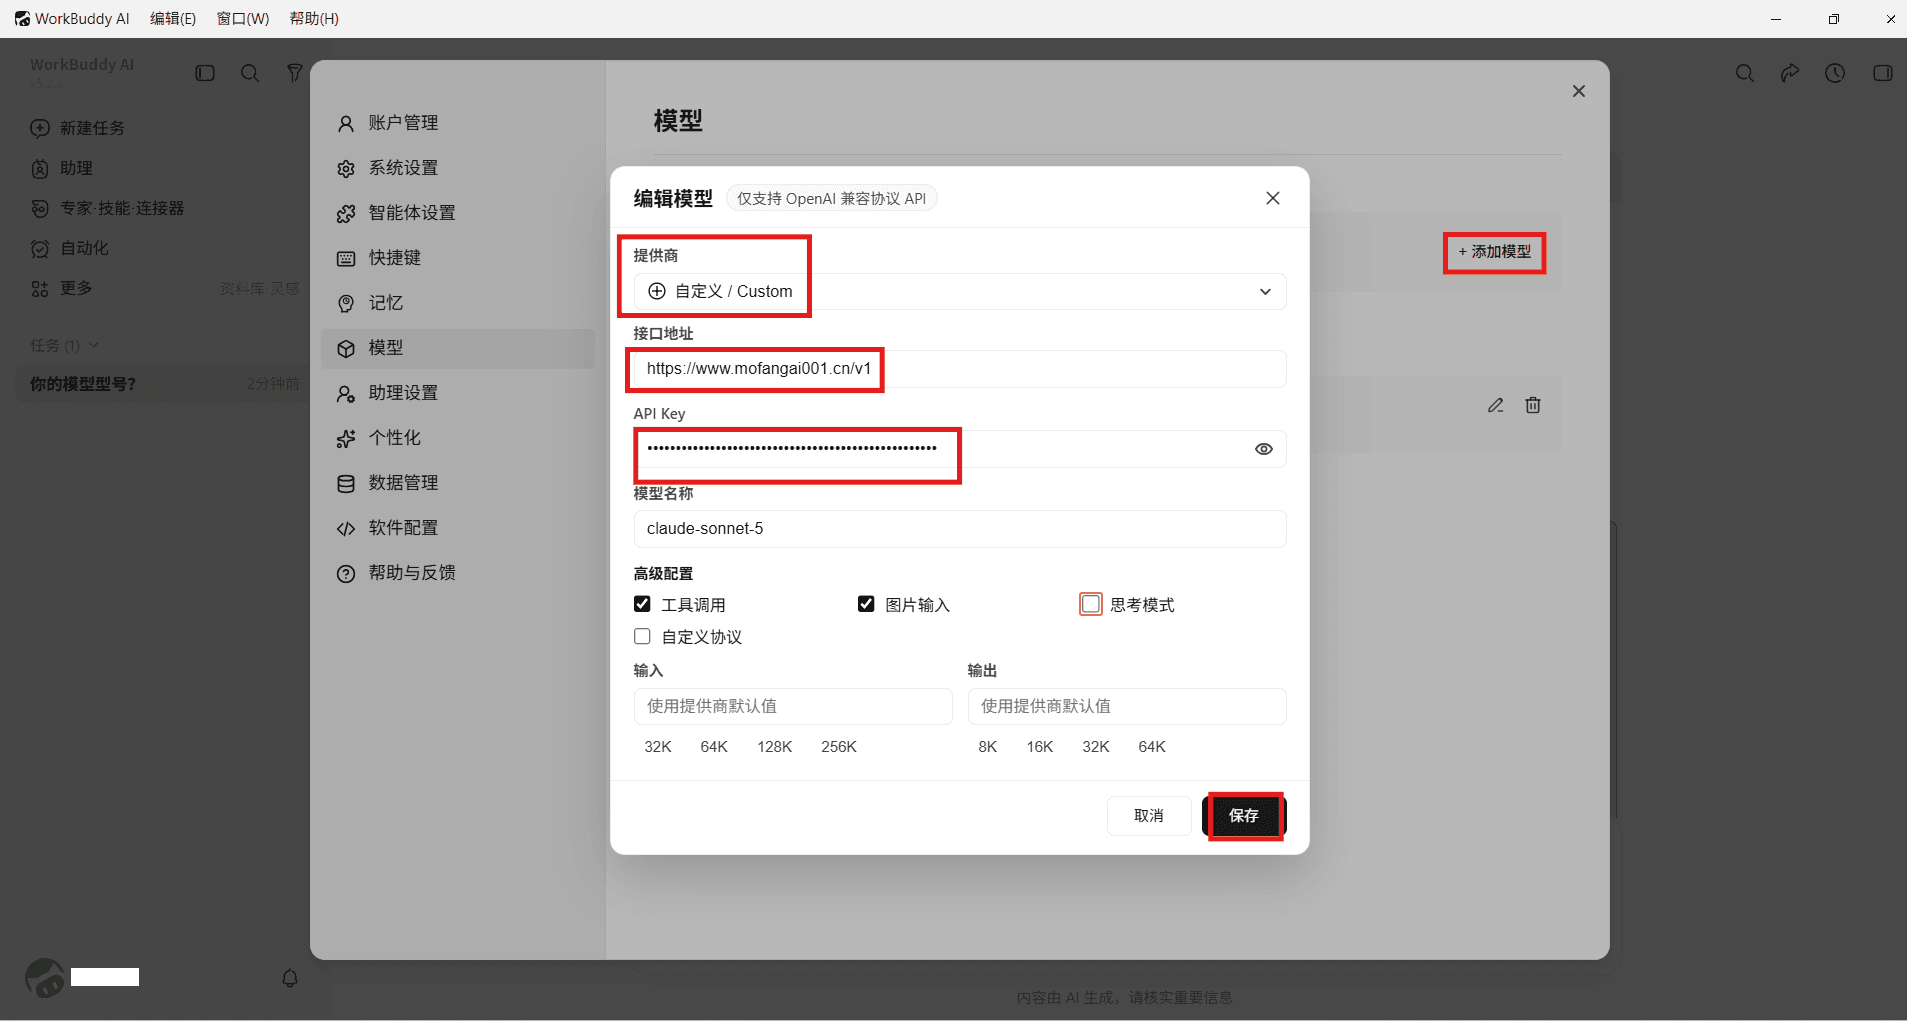
3.2 Add the custom model
Click Add Model, select Custom model, and enter:
| WorkBuddy field | Value |
|---|---|
| Base URL | https://www.mofangai001.cn/v1 |
| API Key | Your 魔方AI API key |
| Model name / Model ID | The exact upstream model ID shown by 魔方AI |
Save the model. If the interface offers switches for tool calling, image understanding, or reasoning, enable only the capabilities the model actually supports. For Agent workflows, prefer a model that supports tool calls.
4. Select the model and test it
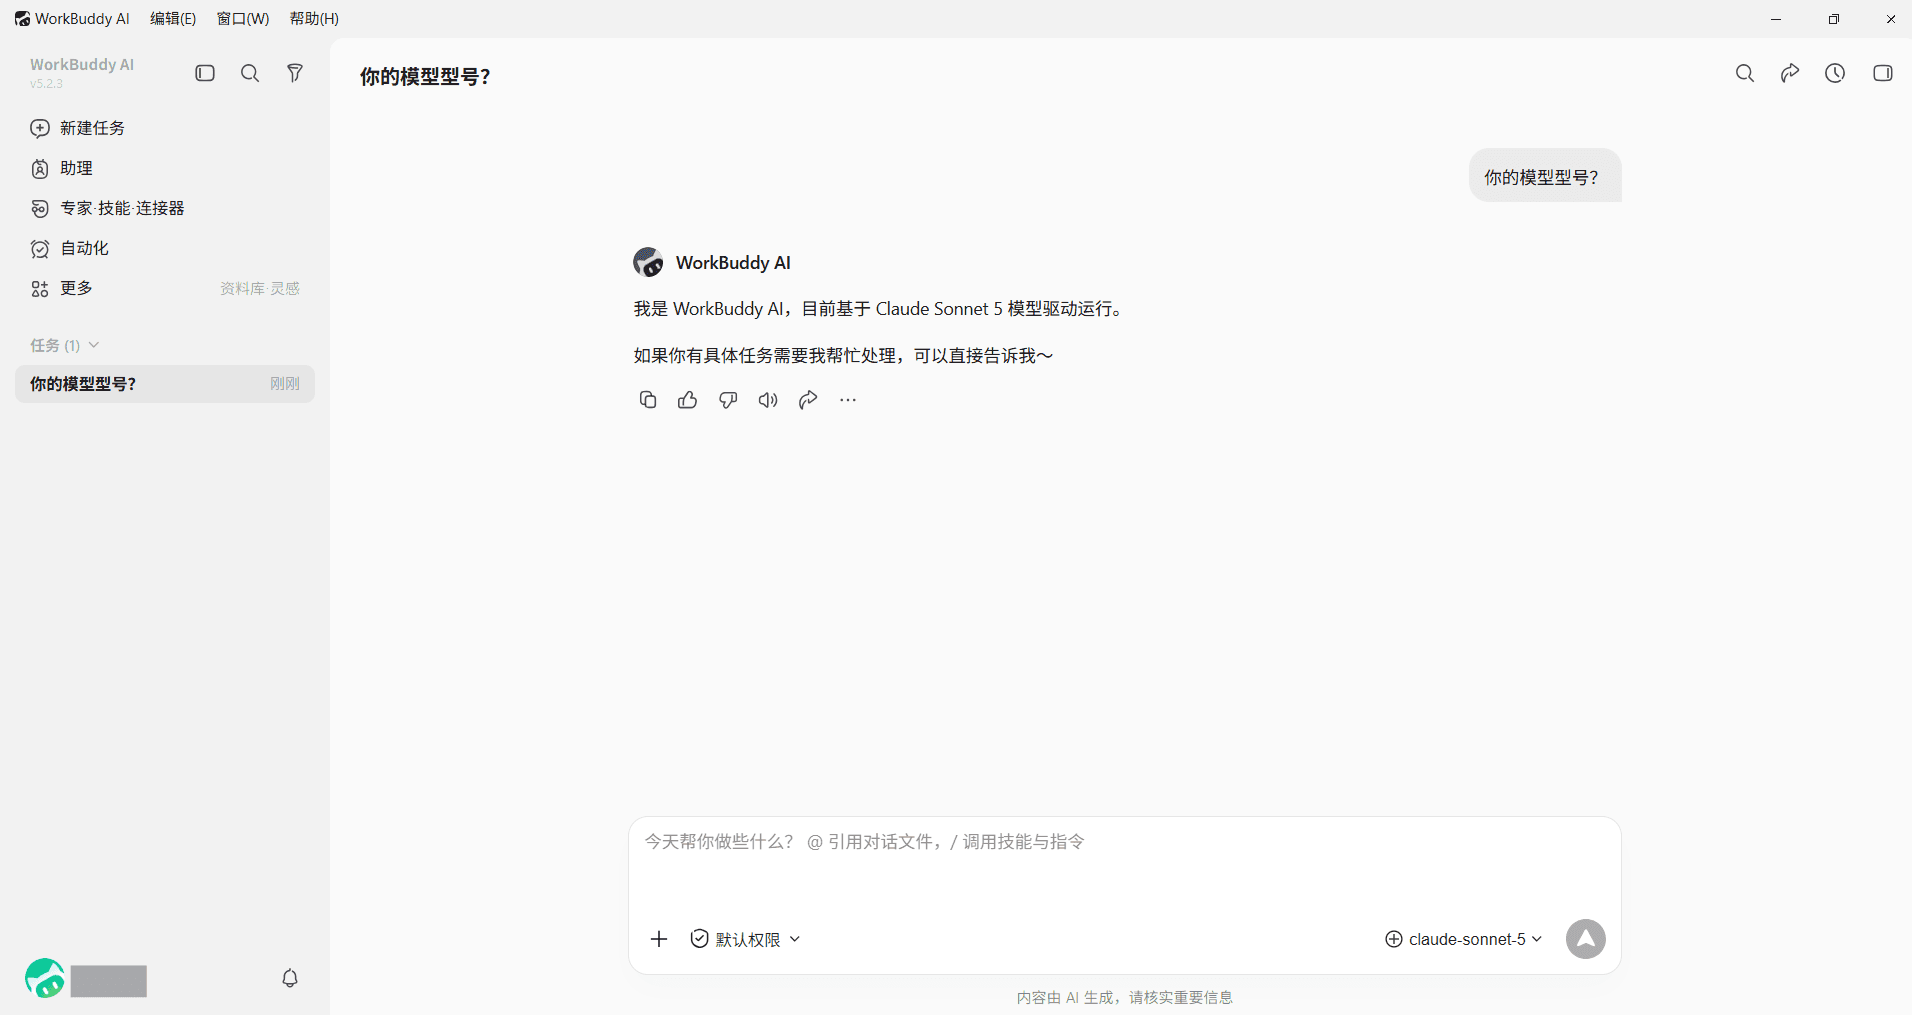
Return to the WorkBuddy workspace, select the new model, and send a test message. If the model is not visible after saving, restart WorkBuddy and check the model list again.
Test a simple request first, followed by an Agent task that needs tool calling. This makes connection issues easier to distinguish from model capability issues.
5. Configure with a file (optional)
You can also edit WorkBuddy's custom model configuration file directly:
| System | Configuration file |
|---|---|
| Windows | C:\Users\<YourUsername>\.workbuddy\models.json |
| macOS / Linux | ~/.workbuddy/models.json |
If the .workbuddy directory is hidden, enable hidden files in your file manager. Preserve existing model entries and add a model object like this:
{
  "models": [
    {
      "id": "YOUR_MODEL_ID",
      "name": "YOUR_MODEL_ID",
      "vendor": "Custom",
      "url": "https://www.mofangai001.cn/v1",
      "apiKey": "sk-your-api-key",
      "supportsToolCall": true,
      "supportsImages": false,
      "supportsReasoning": false
    }
  ]
}
Replace both instances of YOUR_MODEL_ID with the same exact upstream model ID. Adjust the three supports... fields to match the model's actual capabilities, then save the file and restart WorkBuddy.
6. Troubleshooting
401 error or sign-in prompt
The API key is incorrect, expired, or has been deleted. Check its status in the 魔方AI console and copy the complete key again.
404 error or endpoint not found
Confirm that the Base URL is https://www.mofangai001.cn/v1. It must not contain a second /v1 or a manually appended /chat/completions path.
Model not found or request failed
Make sure the model ID exactly matches the upstream model ID shown by 魔方AI and that your API key can use that model. Restart WorkBuddy if its model list has not refreshed.
Chat works but Agent tasks fail
Confirm that the selected model supports tool calls and that the matching capability is enabled in WorkBuddy. Image and reasoning switches should also match the model's actual capabilities.